Multi-part molds
A fitted two-part silicone mold
Cuts the model in half and builds a formwork where the silicone lies in an even layer over the model instead of a block: the mold takes a third of the silicone a box would. The halves are poured one after the other, and the same formwork with the same clamps then holds the finished mold for casting.
- Input: Model
- Output: Two shell halves, two plates and clamps
Building a mold and looking it over needs no account. Signing in is only required to download.
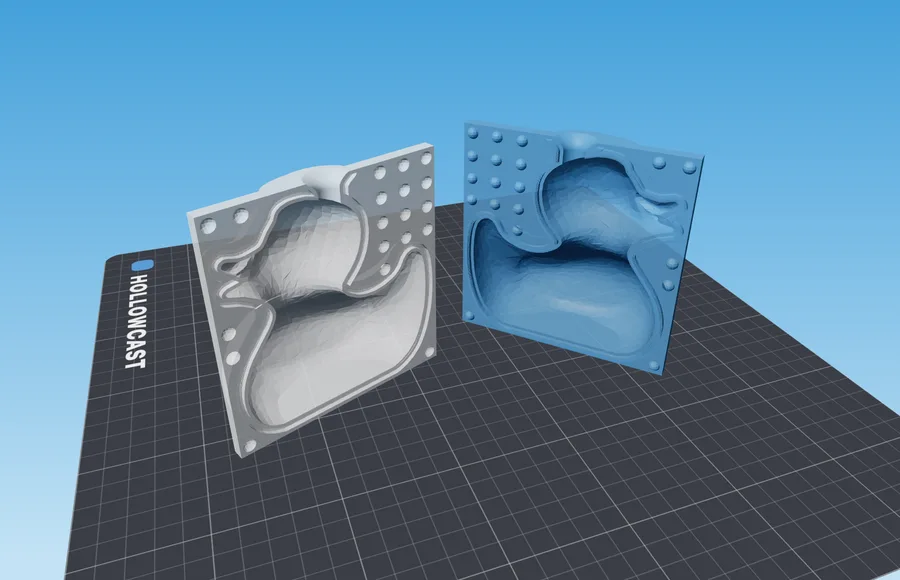
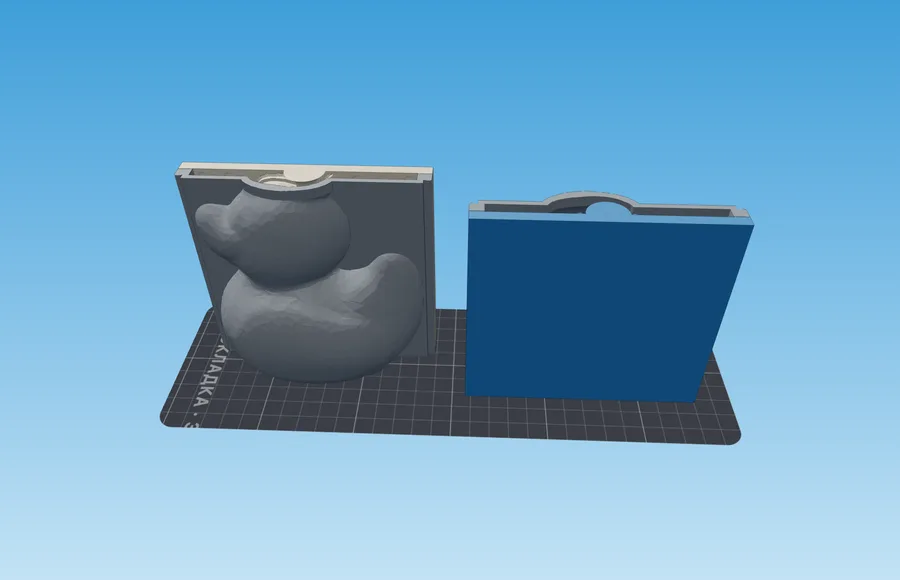 Casting result
What you get
- Silicone in an even layer over the model instead of a block the size of its bounding box; at the seam, a rectangular flange that carries the lock. A 90 mm duck takes 182 ml of silicone against 594 ml for the two-part box mold.
- Two shell halves that are formwork and jacket at once: the halves are poured in them, and the finished mold stands in them for casting. No jacket and no rings.
- Two plates with the model halves and a lock of your choice: a frame along the flange edge, half-spheres along the edge, or a frame around the model with spheres outside it. One plate gets the bumps, the other the matching dimples.
- Two printed clamps on a dovetail rail — the same pair for pouring both halves and for casting.
- A through pour channel and wick groove, nothing to cut with a knife. A funnel for the mouth is in the set, a wick holder is optional.
How it works
- 1Upload the masterThe very model you will be casting copies of. The silicone becomes the mold; everything printed is tooling around it.
- 2Place the seamThe plane in the viewport is the future parting line. Undercuts relative to it are highlighted right away: the seam has to run through the widest place on the model.
- 3Pour one after the other, assemblePut shell A against plate A, slide on both clamps and pour silicone up to the rim. Once it sets, take the clamps off and pull the plate out — the silicone stays in the shell; then the same with B. Finally put the shells together on the keys, lay the wick in its groove, slide on the same clamps and pour through the mouth.
Material and process
What to keep in mind before pouring
| Setting | Value | Why |
|---|---|---|
| Layer over the model | 6 mm, detailed models 8 mm and up | The layer is the mold wall: a thin one tears while demolding, a thick one merely costs more. The same layer runs over the top of the model |
| Silicone layer | 6 mm, 10 mm and up for spheres along the edge | This is how far the flange at the seam reaches past the model, and the lock sits in it. The frame fits at the default, spheres need room to get around the model |
| Plate joint | Square | A ridge on the plate and a groove in the shell keep silicone from escaping at the bottom: in a water test the square did not leak and the half-round seeped. The bottom of the groove in the standing shell prints with supports |
| Release agent | Optional, on the shell and the plate | Platinum silicone sticks to PLA less than tin-cure does, but it still sticks |
Slicer settings are the same for every mold and live on their own page: how to print molds
If something went wrong
Symptom, and what to change
- The halves will not line up
- The lock did not fit on the flange: add silicone layer, reduce the key slot height, or pick ridge and groove.
- Silicone leaks at the bottom while pouring
- Plate joint → square: a flat joint does not seal at all. Push the clamps all the way down the rail.
- A clamp will not slide onto the rail
- The printer prints oversize: fit clearance → 0.20–0.25 mm, and print one clamp as a test.
- The clamps are on but the seam leaks while casting
- The cinch travel is used up — increase the casing seam gap: the silicone stands further out of the shells, and the clamps press it harder.
- The casting comes out torn
- Undercuts relative to the seam: rotate the model or move the seam to its widest place.
Questions
Good to know
How is this different from the two-part box mold?
The box pours each half as a solid block the size of the whole model and cinches it with a separate jacket and rings. Here the silicone runs as a layer over the model, plus a rectangular flange at the seam where the lock sits. A third of the silicone, and no jacket: the halves go back into the same shells they were poured in.
How is this different from Moldboxer?
Moldboxer is a Blender extension: you need Blender itself, an install and a license. Their fitted two-part mold follows the same idea — silicone in a layer over the model, a lock at the seam, a plate with the model half. Here the mold is built in the browser, there is nothing to install, and there is a free plan. What we do not have: a curved parting line, pouring through the base of the model, and working offline.
Why are the halves poured one after the other?
Each half is poured in its own box — a shell closed by the plate with the model half — and the set has two clamps, both of which a box needs. In return, silicone never touches silicone: each half is cast against its own plate, so no release layer between the halves is needed. The second one is poured with the same clamps once the first has set.
How do the halves register against each other?
By a lock on the flange at the seam, and the kind is yours to pick. Ridge and groove (the default) is a frame along the flange edge: it holds the seam along its whole length and seals it against leaks, breaking only at the pour channel and the wick. Spheres along the edge is a row of half-spheres along the edge: they line the halves up but do not seal the seam. Ridge and spheres is a frame around the model itself with spheres outside it, wherever there is room.
Won't silicone leak out at the bottom while pouring?
The joint between the shell and the plate is sealed by a ridge: it runs on the plate in a U around the cavity, and the shell seats onto it with a groove. In a water test the square profile did not leak and the half-round seeped a little — which is why square is the default. The ridge breaks at the wick cutout: there a tab on the plate closes the cutout.
How do I print the parts?
The shell stands bottom down on the bed, the same way it is poured: its outer overhang is straightened at 40°, so the outside needs no supports. Only the bottom of the groove for the plate ridge does — it hangs over the bed. The plates print back down with the model half on top, the clamps lie on their backs.
Does my model go to your server?
It does — but only for the time it takes to compute. We do not store it: no archives, no copies. Until you press the button, the file never leaves your browser.
Related tools